Looking for a fashionable look to relax in by the pool/beach this summer?
I've got you "covered"!
My name is Carly, and I am the new intern/DIY specialist at Elliott Berman Textiles. My goal is to provide you with tips on how to create fashionable looks within your own home for various occasions. All of the projects that I will be presenting to you will have suggested fabrics to replicate the look, and can be purchased through Elliott Berman Textiles. So let's get started on my first DIY project!
DIY #1 Bathing Suit and Cover Up
Step #1 - Fabric
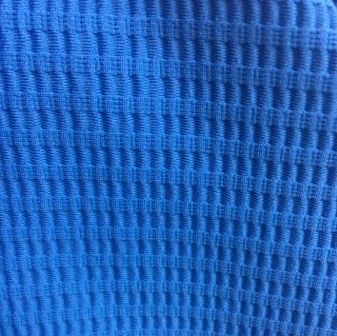
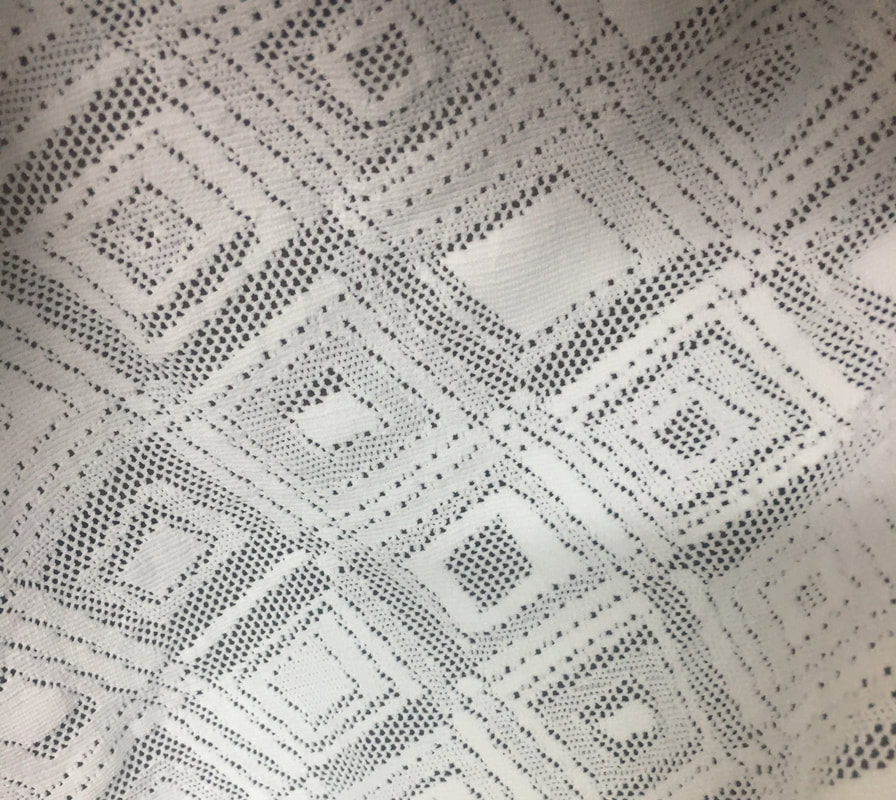
The first thing you will want to do is find your fabrics. The fabrics I choose (shown below) are from Elliott Berman. I picked these fabrics because I liked the nautical look of blue and white together, also it will be perfect to wear for the 4th of July. The bathing suit material has a good stretch and the coverup material is just see-through enough to see the blue of the bathing suit underneath.
The first thing you will want to do is find your fabrics. The fabrics I choose (shown below) are from Elliott Berman. I picked these fabrics because I liked the nautical look of blue and white together, also it will be perfect to wear for the 4th of July. The bathing suit material has a good stretch and the coverup material is just see-through enough to see the blue of the bathing suit underneath.
 |  |
Step #2 - Gather up all materials.
- Fabric
-A pair of underwear and sports bra that you enjoy the fit of
-Tracing paper
-Scissors
-Thread
-Elastic
-Sewing machine that has a Zig-Zag Stitch setting
-Pattern of a dress or a dress that you enjoy the fit of
- Fabric
-A pair of underwear and sports bra that you enjoy the fit of
-Tracing paper
-Scissors
-Thread
-Elastic
-Sewing machine that has a Zig-Zag Stitch setting
-Pattern of a dress or a dress that you enjoy the fit of
Step #3- Bathing Suit
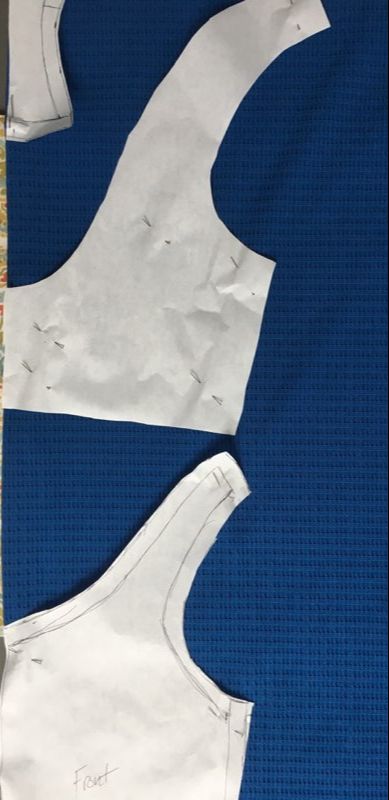
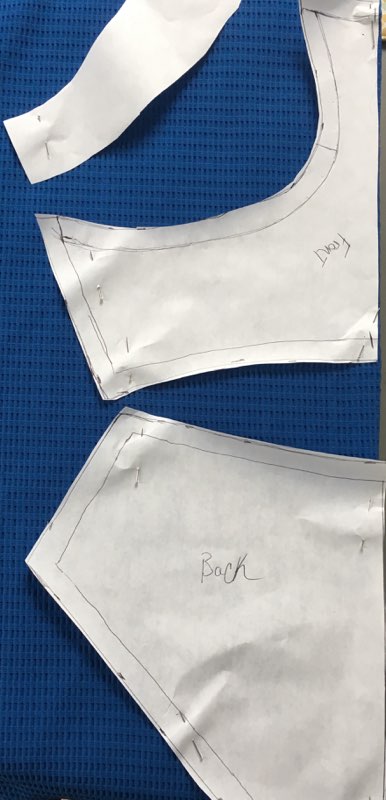
Fold your underwear and sports bra in half and trace them on to tracing paper to create a pattern. The pattern will only need to show half of the top and bottom's front and back because you will be cutting the pattern out on the fold of the fabric. Make sure that after you trace out the pattern that you go back and add on seam allowance for sewing the pieces together and hemming. I added 1/2" inch for the seam allowance but I would recommend adding more 3/4" to 1".
Fold your underwear and sports bra in half and trace them on to tracing paper to create a pattern. The pattern will only need to show half of the top and bottom's front and back because you will be cutting the pattern out on the fold of the fabric. Make sure that after you trace out the pattern that you go back and add on seam allowance for sewing the pieces together and hemming. I added 1/2" inch for the seam allowance but I would recommend adding more 3/4" to 1".
 |  |
Step #4 - Sewing Steps
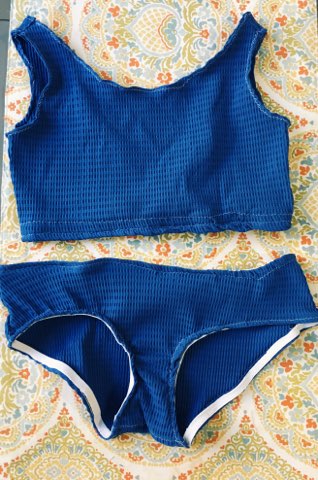
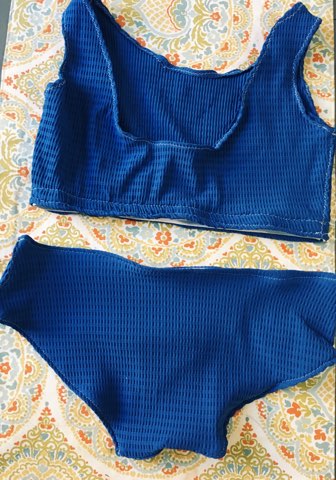
Sew the seams together with right sides facing in. (I wanted the zig- zag stitch to show, so i went back over the seams after flipping it out). Then once the seams are sewn together it is time to sew on the elastic. Using the same stitch sew elastic on the leg holes on the bottom, then on the waistband. (If I left myself enough allowance I would then rolled the elastic over and sewed a top stitch.) For the top you should only need elastic on the bottom band around the waist. Finish of the rest of the edges and TADA your new bathing suit! (Also depending on the fabric you may need to line the bathing suit, meaning cutting out an extra piece for the top and bottom.)
Sew the seams together with right sides facing in. (I wanted the zig- zag stitch to show, so i went back over the seams after flipping it out). Then once the seams are sewn together it is time to sew on the elastic. Using the same stitch sew elastic on the leg holes on the bottom, then on the waistband. (If I left myself enough allowance I would then rolled the elastic over and sewed a top stitch.) For the top you should only need elastic on the bottom band around the waist. Finish of the rest of the edges and TADA your new bathing suit! (Also depending on the fabric you may need to line the bathing suit, meaning cutting out an extra piece for the top and bottom.)
 |  |
Step #5- Cover up
Start with a dress pattern or a dress that fits you well and has some flow to it. (If you use a personal dress make sure to fold it in half and trace at the seams for a pattern.) Fold your fabric so the selvages match up and place your pattern on the fold and proceed to cut it out. (I also added sleeves but they are optional.) Pin and sew the seams together with the right sides facing up using the same zig-zag stitch. Then flip it inside out trim and incase the seam you just made to make a french seam to give a nice finish. Next I cut my front panel in half directly down the middle and hemmed the raw edges all the way around. (If you desire more of a closure for the cover up it would be an easy step to add a draw string on the front.) Your summer look is now finished and is ready to go for a dip :)
Start with a dress pattern or a dress that fits you well and has some flow to it. (If you use a personal dress make sure to fold it in half and trace at the seams for a pattern.) Fold your fabric so the selvages match up and place your pattern on the fold and proceed to cut it out. (I also added sleeves but they are optional.) Pin and sew the seams together with the right sides facing up using the same zig-zag stitch. Then flip it inside out trim and incase the seam you just made to make a french seam to give a nice finish. Next I cut my front panel in half directly down the middle and hemmed the raw edges all the way around. (If you desire more of a closure for the cover up it would be an easy step to add a draw string on the front.) Your summer look is now finished and is ready to go for a dip :)
Recommended Fabric
If you liked the fabric I choose or any of the other fabrics shown below please email: [email protected] !
If you liked the fabric I choose or any of the other fabrics shown below please email: [email protected] !


 RSS Feed
